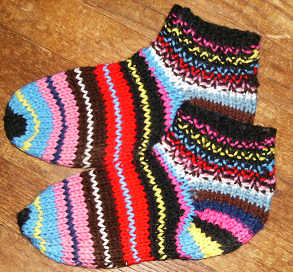
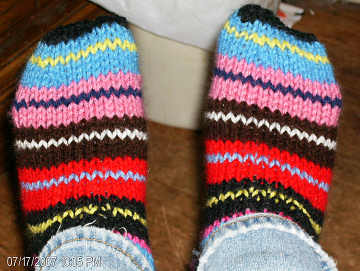
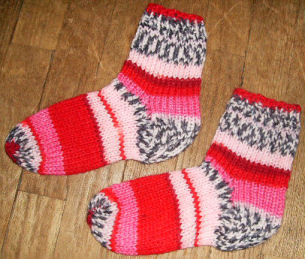
These socks are perfect for anyone and are knitted in the round. They can be made with a solid color, or stripes like the ones above! The pattern will be written for one color, but you can switch colors whenever you feel like it. Perfect for using scraps of yarn. They fit my size 4 feet but will fit up to a size 6. If you need them to be longer, you can easily add more rows to the foot length. If you need wider, then cast on more stitches or use a slightly bigger gauge.
Type: Knit
Difficulty: Medium
Yarn weight: Worsted Weight
Needle type: 4 double pointed needles
Needle size: US-8
Gauge: 4 sts per 1 in.
Gauge: 4 stitches equals about 1 inch. 5 rows equals about 1 inch. Use 4 double pointed size 8 needles to knit round. If you canít find them at a store, be creative. Use dowel rods or chopsticks. You can sharpen the ends easily in a pencil sharpener. I used chopsticks myself. Just make sure that the gauge is right. These socks use worsted weight yarn. I used red heart acrylic yarn.
Now letís get started!
The cuff: Cast on 30 stitches on to one needle. Separate the stitches evenly on 3 of the needles so that there are 10 stitches on each needle. Rib for 15 rounds. You can rib by doing knit one purl one and repeating that around the entire cuff.
The heel: Knit one more round, but do not rib. Rearrange the stitches so that there are 18 stitches on one needle and 12 on the other. The needle with 18 stitches on it is going to be for the heel. Pick up one of the spare needles and work 12 rows in stockinette stitch by going back and forth with the needle with 18 stitches on it and the new one. Leave the needle with the 12 stitches on it alone, you will need it later.
After you have completed the 12 rows, it is time to start shaping the heel. For the first row, you need to purl 4, purl 2 together, purl to the last 6 stitches, purl 2 together, purl 4. For the second row, knit the entire row. Repeat those two rows until there are only 10 stitches left. End at row 2.
Now you have to get the sock going in the direction of a foot. To do that, you need to pick up the stitches at the side of the heel. Take one of the needles that you are not using and pick up 9 stitches at the side of the heel. Start to knit round again and knit into the stitches that you picked up at the side of the heel. Pick up 9 more stitches on the other side of the heel. Complete the round.
The foot: You should have 40 stitches left on the needles. Rearrange them so that they are spaced out evenly on the 3 needles. You will now need to decrease for your foot. Decrease once on every needle in the next round. You should now have 37 stitches altogether. Repeat that round and you should have 34 stitches all together. Repeat that round again and you should have 31 stitches in total. In the next round only decrease on the first needle so you have only 30 stitches remaining. Work in the round with those 30 stitches until the sock is at the base of your big toe. It took me 20 rounds.
The toe: You need to decrease the number of stitches so the sock will fit your toes. The first round, you have to decrease twice. Try to evenly space out the decreases. Like on the first and third needle. The second round, you need to knit all the stitches. Repeat those two round until you only have 22 stitches remaining on the needles. End with the second row.
Now you need to close up the toe. There are a couple of different ways you can do this. I rearranged the stitches on to 2 of the needles with 11 stitches on each needle. Next I cut the yarn leaving a long end for sewing. Then I used a yarn needle and grafted the toes by running the yarn back and forth though the knitting loops. Another way to end the toes is the 3 needle binding off method. Or you can bind off all the stitches and sew them together with a yarn needle.
If you have made it this far, then hopefully you have completed a sock! If not then I am sorry. If so, then make the second sock! MUHAHAHAHAÖ


